

How To Repair Vinyl Backed Wallpaper
Yous can't stand to expect at that old wallpaper for another minute. It was trendy 20-30 years ago, but now it's merely outdated. You lot demand a fresh start on those walls and you lot've made the determination to take the old paper down. With a trivial patience, removing wallpaper can be a directly-forward and easy job. To learn how to remove wallpaper in 6 elementary steps, and the underground to making the new installation even easier, check out the following application recommendations.
Tools/Materials You Will Demand
- Piranha™ Scoring Tool
- Piranha™ Wallpaper Scraper
- Piranha™ Removal Sponge
- Or get the basics in a kit — Piranha™ Wallpaper Removal Kit
- Piranha™ Wallpaper and Paste Remover (like shooting fish in a barrel to use spray canteen)
- Concentrate Remover
- Ready-to-Use Gel
- Set up-to Utilize Liquid
HOW TO REMOVE WALLPAPER IN half-dozen SIMPLE STEPS
one. Test a small area
Find a small surface area, about two' x 2', preferably with a seam in it. You are going to perform the same steps on the examination area that you will use to complete the entire job. Take a large putty knife and locate the seam. Use the putty pocketknife to loosen the seam from the wall to see how well the wallpaper is fastened and how many layers you will be removing. Make a note if the wall you are working on is plaster or drywall.
Important NOTE:
For homes more than than l years onetime, y'all may have plaster walls. These are harder to impairment when removing the wallpaper than drywall. If the dwelling house is less than 50 years old, at that place's a good chance your substrate is drywall and you want to be conscientious not to impairment information technology with the scraper or scoring tool as information technology will create more work for yourself when you get gear up to prep the walls for new paper.
Adjacent, take your scoring tool and with a circular motion, go over the test area with fifty-fifty pressure level to lightly puncture the face of the newspaper. Don't press too difficult. You are just making lite perforations to allow the remover easy access through the wallpaper onto the wall to make sure information technology is saturated.
Apply your wallpaper remover to the entire exam area. Make sure all the wallpaper is wet.
Wait 15 minutes before you try to peel off the paper. Trying to get a head start at this bespeak volition cause you more than piece of work down the road. Let the remover solution do its job past sitting on the paper a total xv minutes.
At present, try removing the sometime wallpaper on the test surface area. If peels correct off you are gear up to kickoff your project.
2. Protect Furniture, Floors and Electrical Outlets
Apply this checklist when preparing your wallpaper removal:
- Motion all your furniture to the heart of the room, or to some other room then that there is no hazard of getting remover or erstwhile wallpaper on it.
- Remove items from the walls then that you take a clear surface to work on.
- Protect your floors past laying down painter's tarps on the floors throughout the room.
- Disconnect power from the area you are working in at the electric panel.
- Remove electrical outlet covers.
- Turn off whatever fans in the room.
- You should also consider closing Air conditioning/heating vents in the room to reduce the flow of air. Remember, moving air will dry out the remover faster — and that is not a adept thing!

iii. Score the wallpaper
Regardless of the type of wallpaper you are removing, a scoring tool will make the chore much easier. It creates tiny holes in the wallpaper that allows the remover solution to penetrate the wallpaper. Only rub it over the area you are working on in a circular motion while applying fifty-fifty pressure.
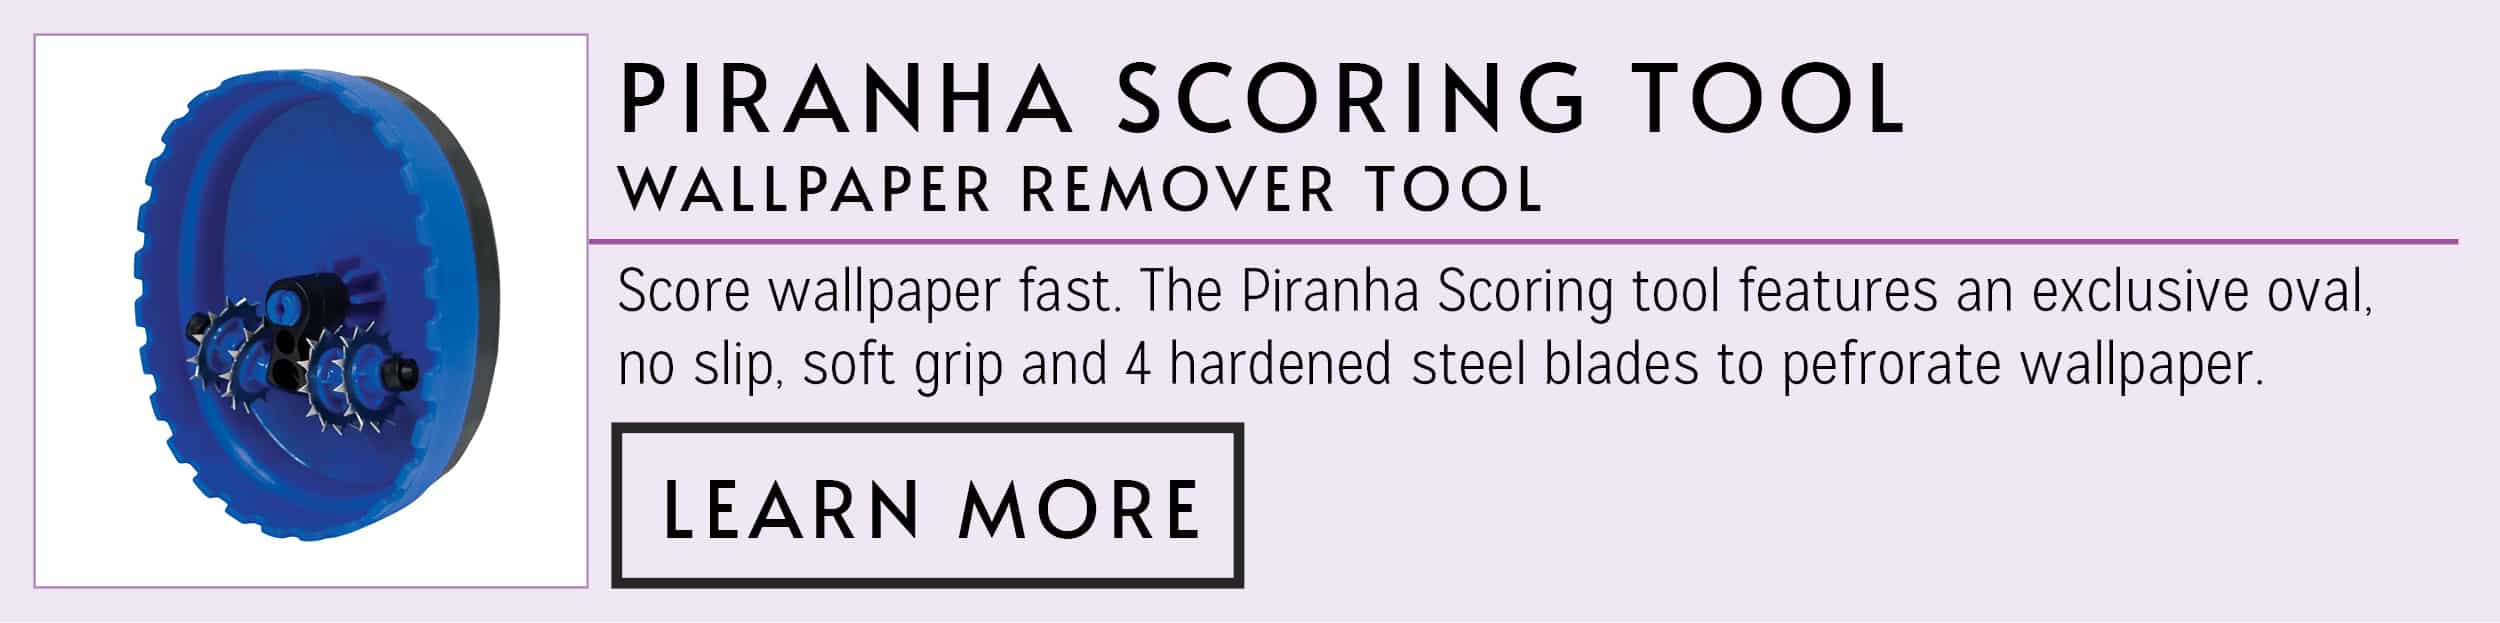
It is recommended that you piece of work in an area no wider than 4'. This will help ensure that the remover solution does not dry out before you lot tin scrape the wallpaper and one-time paste off.
4. Spray Removal Solution on the Wallpaper
Roman's Piranha™ make removers will help break down paste and release wallpaper from the wall. Piranha™ formulas arenon-toxic and non-staining so it is safe to use, and it has no offensive odors.
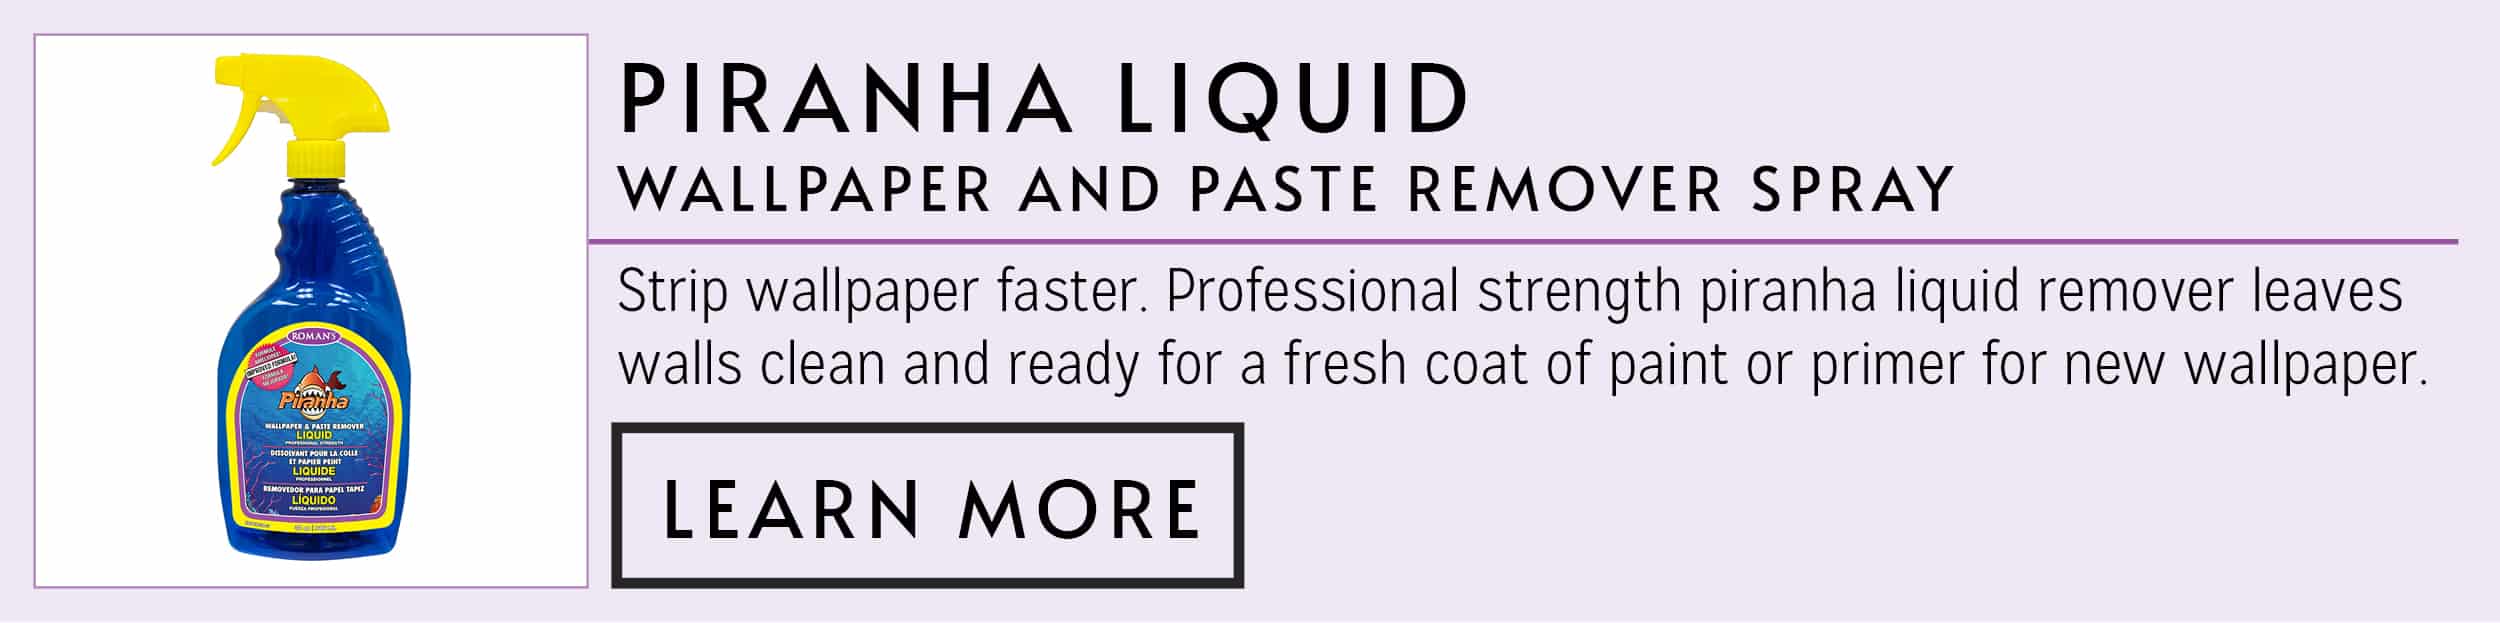
Go on the walls saturated with remover to ensure the paste doesn't dry out. With the room prepped, you're set to employ the remover solution to the walls. Be sure to wear eye protection.
Have a large garbage tin set for a user-friendly place to place large pieces of wallpaper waste material/debris direct into. This will save you cleanup time later. The minor pieces that hitting the floor will be caught by your painter's tarp.

v. Scrape
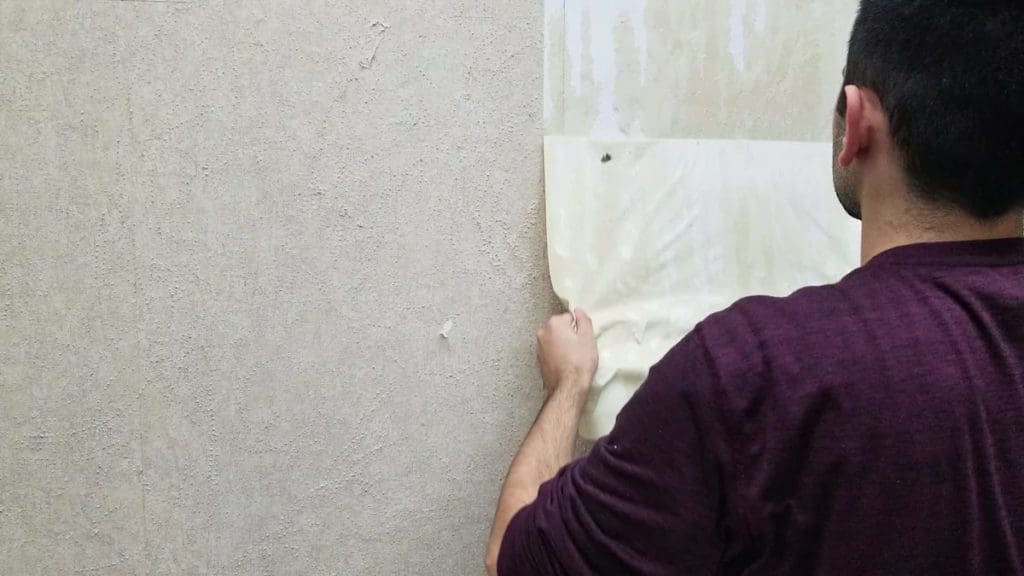
In one case the remover solution has had time to break downwardly the wallpaper paste, begin scraping the walls clean. The wallpaper seam is an ideal starting place. If the wallpaper however adheres well, apply some boosted removal solution to the wall.
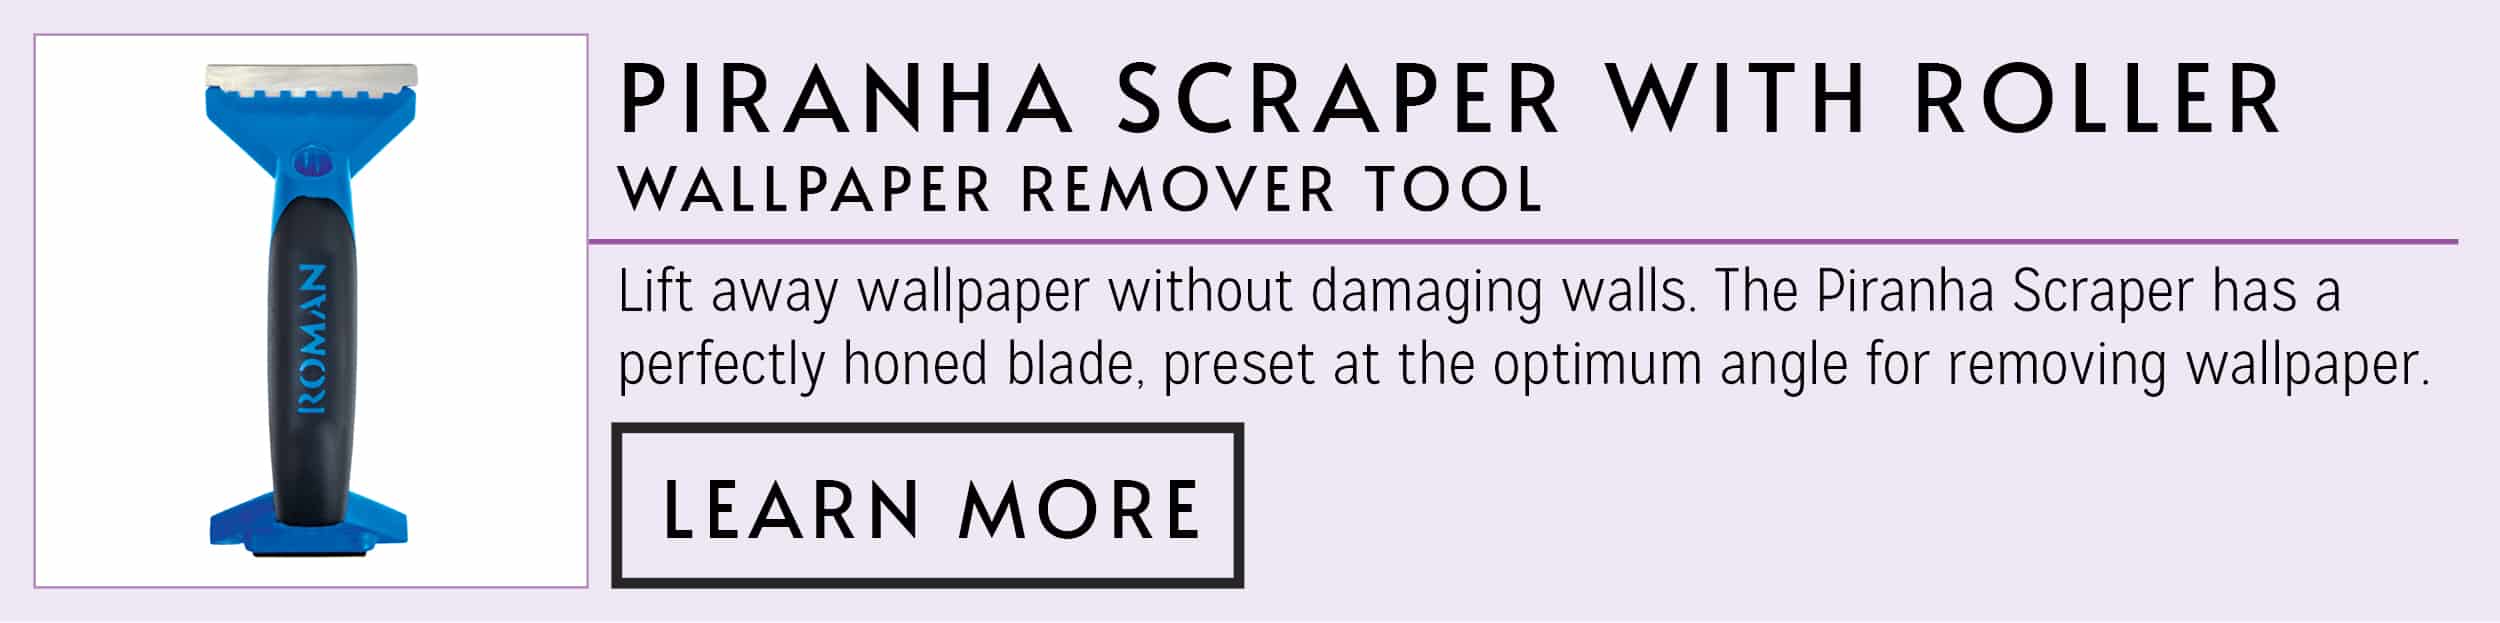
Y'all may detect that some old paste is still adhering after the old paper has been removed. Just use some more Piranha™ remover to these areas, wait 15 minutes, and then scrape the backlog paste off.

half-dozen. Clean Upwards
After the wallpaper and old paste has been completely removed, be sure to sponge downwards the walls with removal solution. This volition assist remove any rest wallpaper paste.
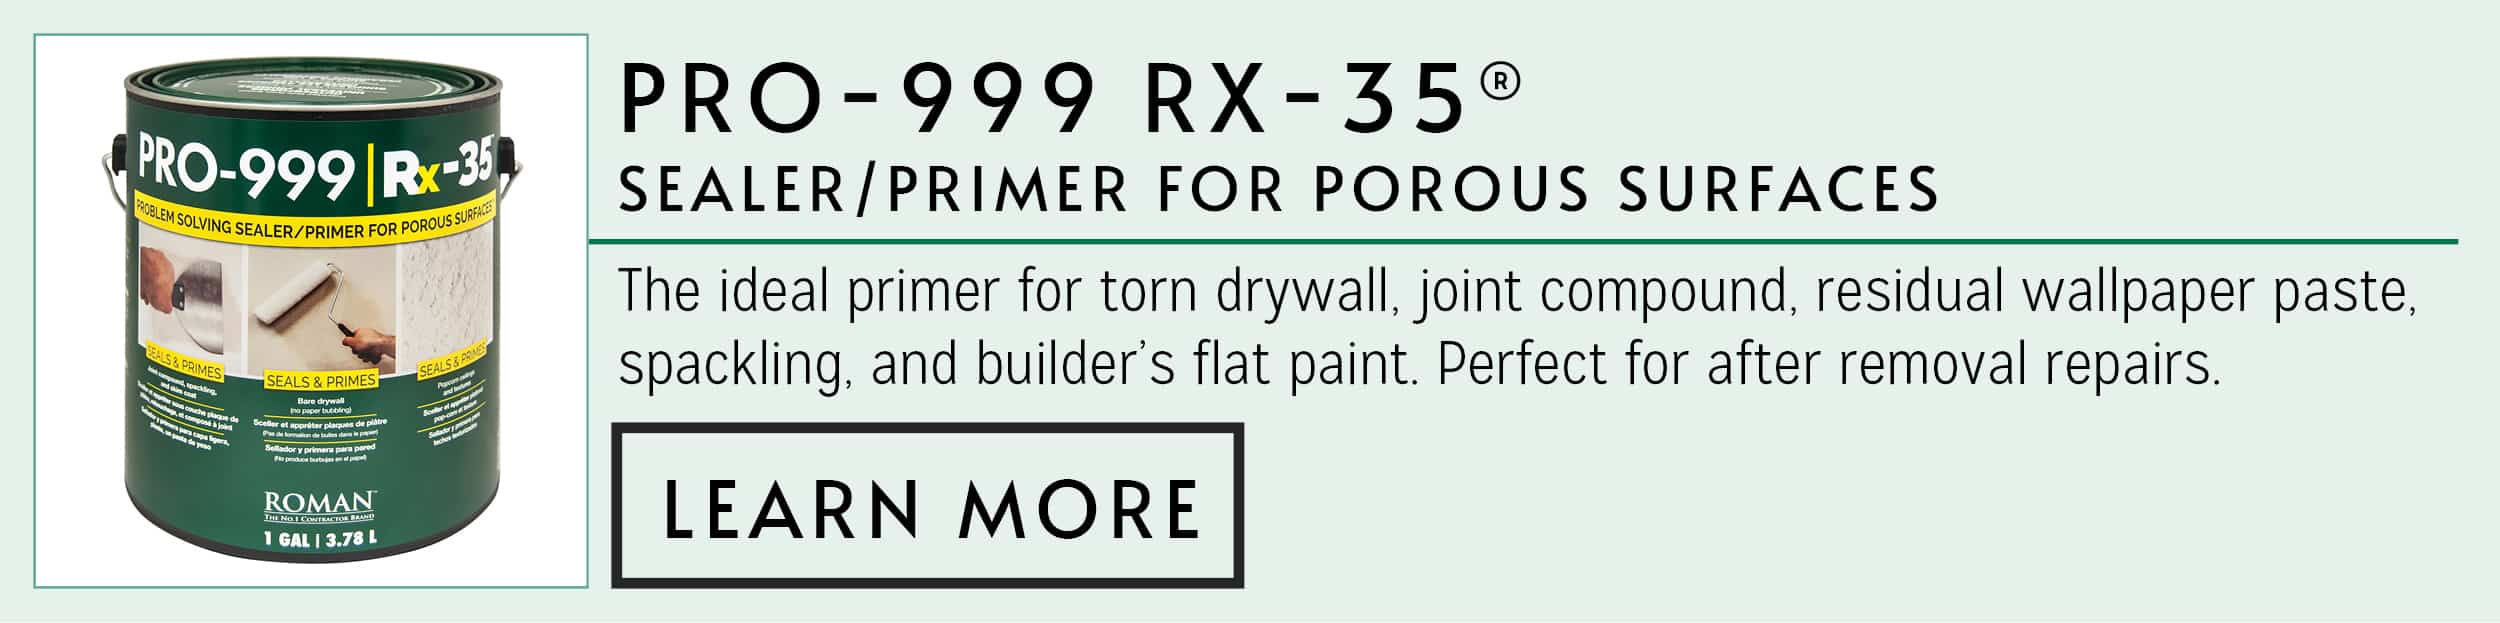
Prep walls for installing new wallpaper or paint — Primer
This is the underground that volition brand a new installation or paint project so much easier. Later you take removed the old wallpaper, sponge-cleaned the entire area, and repaired any damage, utilise a fresh coat ofRoman PRO-999 Sealer/Primer to ensure that your next project will exist a success.

How To Repair Vinyl Backed Wallpaper,
Source: https://romandecoratingproducts.com/howto/how-to-remove-wallpaper/
Posted by: mirandareliblese47.blogspot.com
0 Response to "How To Repair Vinyl Backed Wallpaper"
Post a Comment